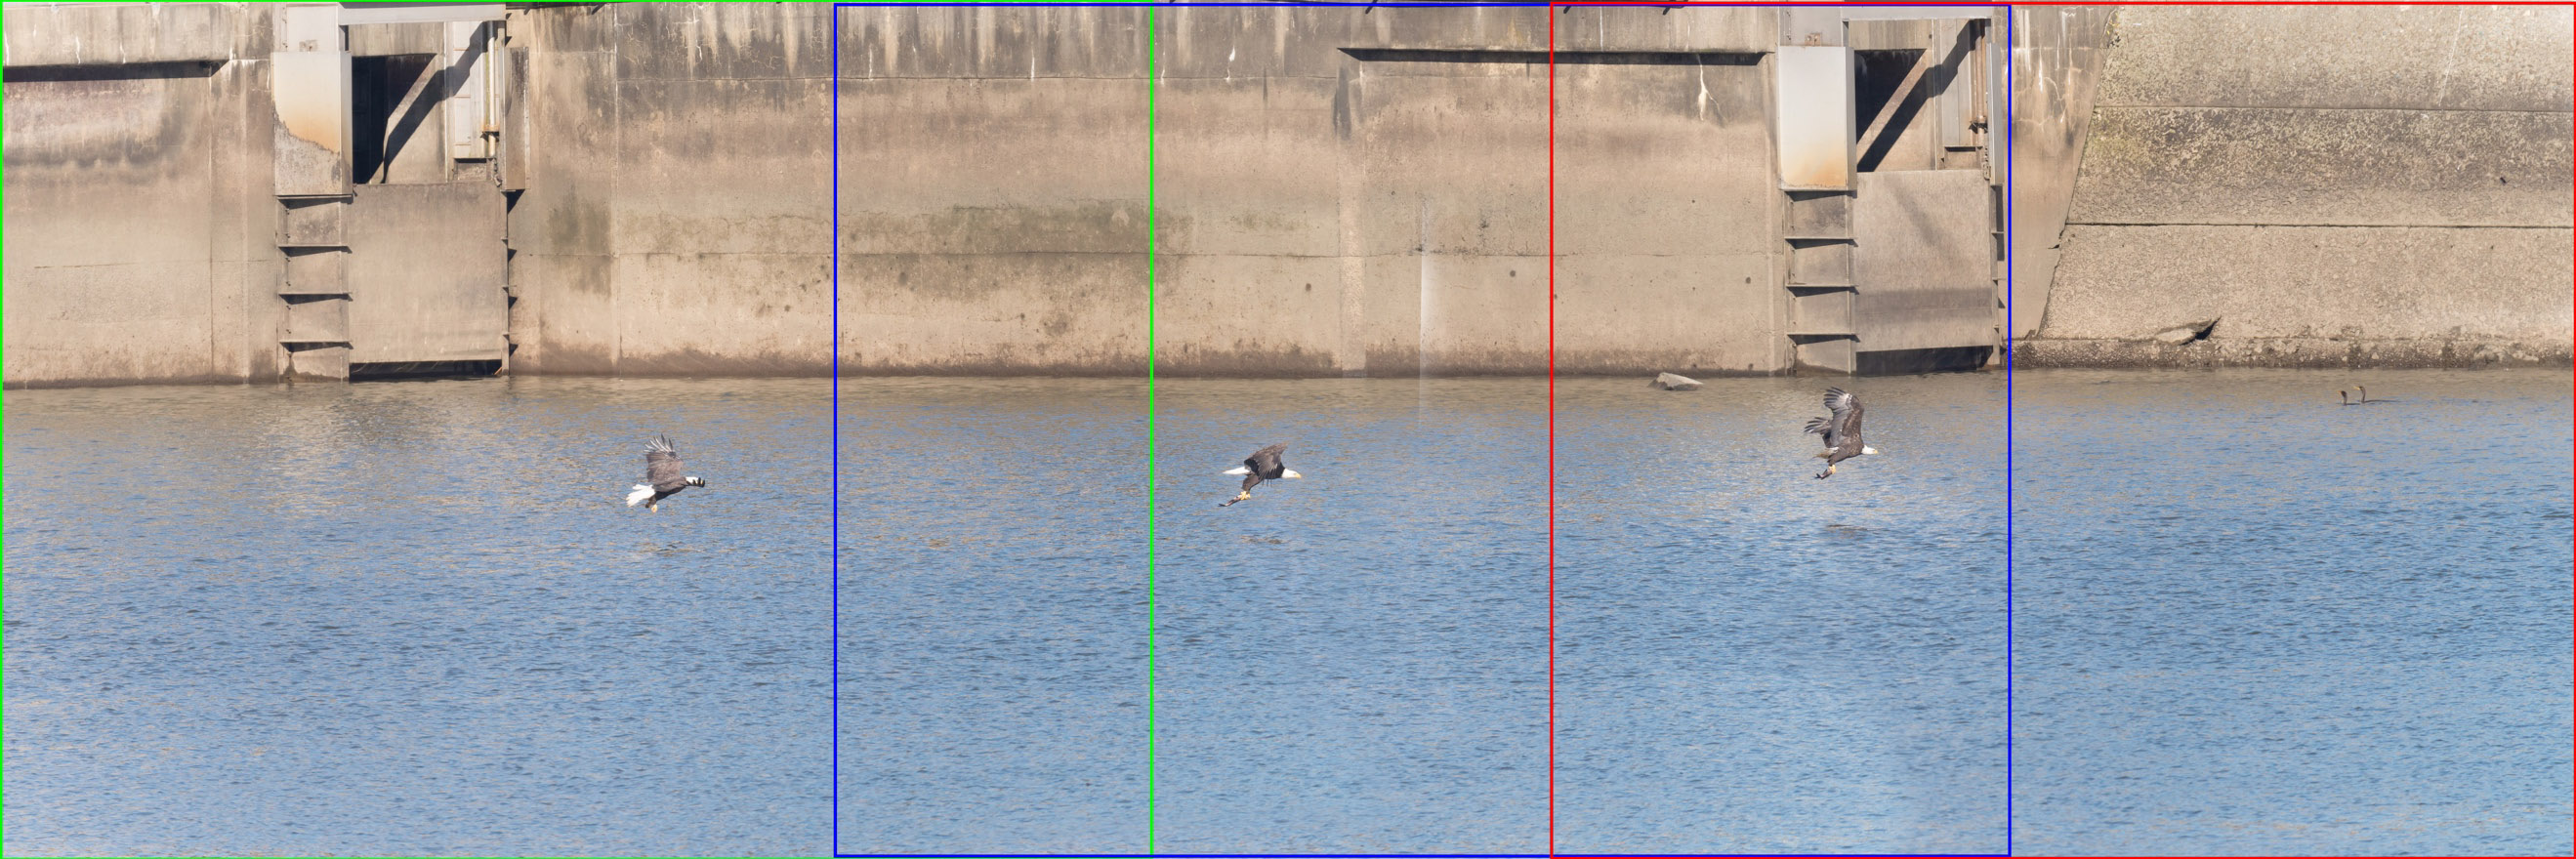
Sometimes a single picture isn’t enough. Wildlife photographers often struggle with capturing a scene for a number of reasons – the subject is facing the wrong direction, the lighting is poor, composition angles are limited, or simply the subject is moving. This piece will address the latter and give the prepared photographer a chance to create a memorable image.
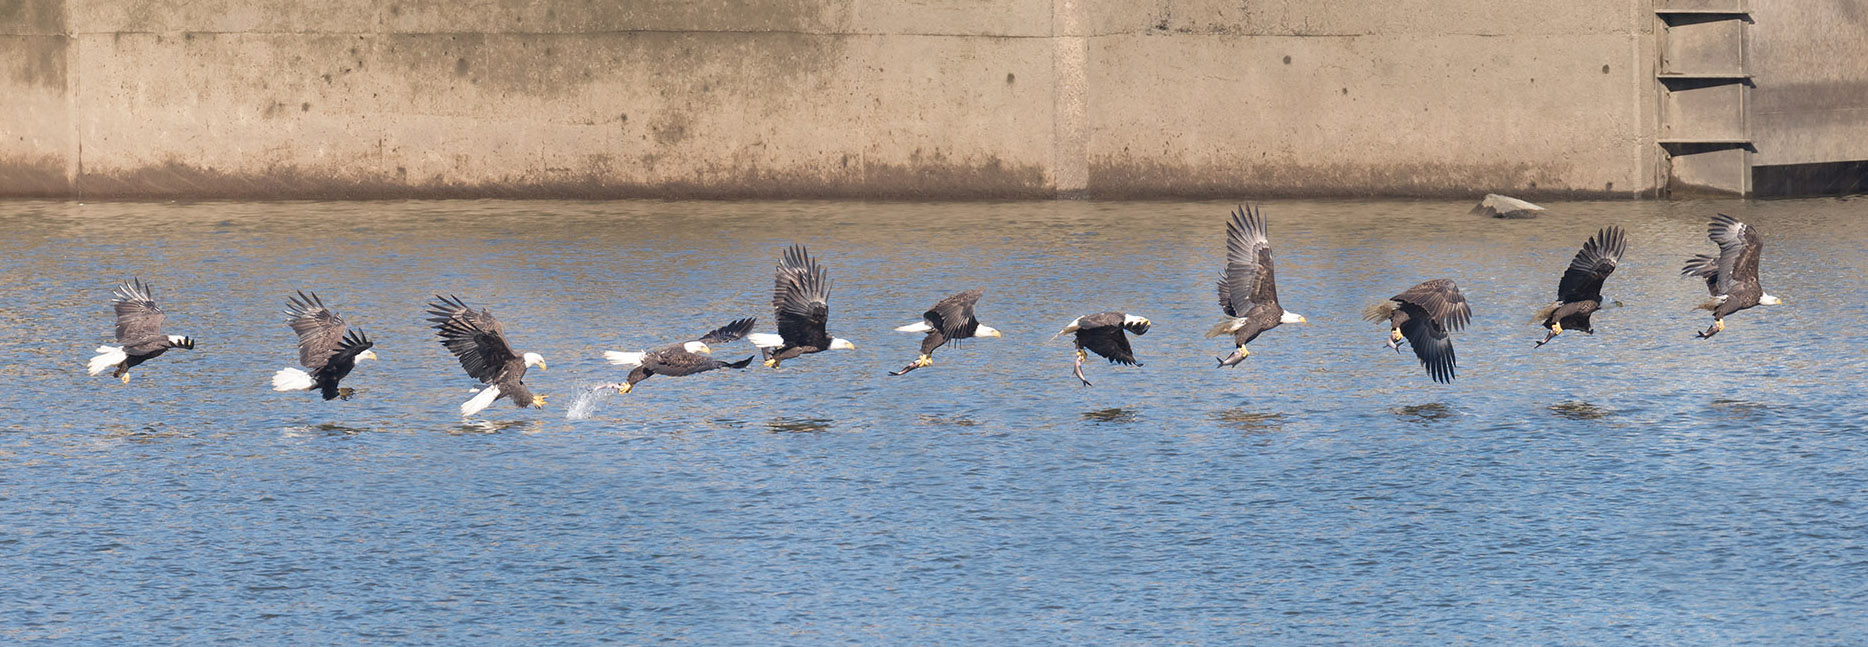
On a late November trip to Conowingo Dam (Conowingo, MD) with some former Nat Hab travelers I met on a trip to Yellowstone, I was afforded the opportunity to photograph dozens of bald eagles as they fished from the Susquehanna River. The eagles would grab fish from the area below the dam and fly overhead, seeking a secluded spot to eat in nearby trees. With dozens of eagles in the area, there were seemingly endless opportunities to photograph the birds in flight and fishing. For the sequence above, I had been following the bird for a few minutes in the air before it made a run near the water and quickly plucked an unsuspecting fish.
The first part to creating such an image is preparing your camera for a fast action sequence.
1) Set your shutter release to high continuous
2) Set your camera to manual exposure mode
3) Set your shutter speed fast enough to freeze the action (1/1000 or faster)
4) Set your aperture to accommodate a reasonable ISO (depends on your tastes and camera sensor)
The composition of this type of photo frequently requires panning while the animal moves, so you may need to zoom out to provide some context for the background of the image. My image above is composed of 11 individual frames captured over a 2-second sequence. In a typical individual frame (below), note how relatively small the eagle appears despite shooting at 840mm when the subject is a couple hundred yards away. Also, notice how much space the eagle can travel within the frame. This is critically important when building the composite image.
As the action occurs, hold down your shutter release until you run out of buffer space on your camera or you are satisfied the action is captured. Do not delete any images at this point as early and late shots may help round out the background for your final image.
As you import the sequence into Lightroom or your photo editing software, you will want to ensure that you make the same image corrections to each of the files to maintain the same look and feel to each of the input images. (Do not sharpen, apply vignettes, etc. at this point in post-production.).
Next in Photoshop, you will want to open each of these images in the sequence and create a large canvas and place the first and last images on each end of the canvas. In my image below, I needed a middle image to fill in the missing area between the bookend images. These three images will be your background. To perfectly align them, you can change the layer opacity to 50% and then gradually nudge them until there is no ghosting. There should be no exposure variation between the images either because the images were all exposed in manual mode – using the exact same settings.
Now that the background image is created, the next step is to individually align each additional image. Because the background of each new image you add will perfectly align with your newly created sequence background, you can utilize the same layer opacity and alignment nudging to perfectly place the images. Now at this point, you may be in the enviable position of having a camera with a sufficiently high FPS (frames per second) that your subject overlaps with itself from image to image. (This allows you to choose the best non-overlapping images to create your sequence).
With your newest image in the sequence perfectly aligned with your background, add a layer mask by clicking the layer mask icon at the bottom tool panel of the Layers window. The layer mask will default to white, which shows the entire layer. The goal of using the layer mask will be to only reveal the bird on this layer, which the masking will help accomplish. To begin, select a black paintbrush and click the white layer mask in the Layers window. Next, paint carefully over the image of your subject and you will see it begin to slowly disappear. Once the subject has been completely removed from the image, click the layer mask, then from the menu navigate to Image, Adjustments, Invert.
This will flip your layer mask and reveal only the subject from this layer, while revealing the background which is now revealed with the layer mask. The white of your layer mask will show the image on this layer and the black areas will show the background (potentially multiple layers all ordered beneath this layer).
Repeat this process for each image in the sequence and your Layers window should look something similar to this.
If you are willing to trust Photoshop (or Lightroom), it can attempt to begin the process for you using Photomerge. Under the file menu, navigate to Automated, then Photomerge (panorama). Next select the “Auto” layout option, but if that gives a skewed result, try another Layout option. The four check boxes at the bottom should be experimented with to improve results, though I’d suggest toggling on Blend Images Together, which can help make for a seamless transition between images even if exposures are moderately different.
Alternatively, depending on how similar your images are, Photoshop can attempt to automatically align the images using a script. Under the file menu, navigate to Scripts, then Load files into Stack. This will save you the trouble of manually aligning your images, though you will still need to utilize layer masks to isolate the subject from the background.
Photostacking can open up a world of new creative possibilities and can be a great way to showcase your work when you just can’t choose the best single image. Because you are ultimately creating a single static image, it’s crucial to maintain a constant exposure to effectively blend the individual frames. Even an exposure as challenging as a bird flying across the morning sun can be workable if your in-camera settings follow my suggestions above.
By Mac Mirabile, WWF


